Fink AI
Version 07/10/2026
This manual covers the Fink AI service, available at https://ztf.fink-portal.org/download. In case of trouble, send us an email (contact@fink-broker.org) or open an issue .
Purpose
Updating a science module in the broker requires a pull request, a review and a new release, and all modules share the same package versions.
Fink AI is a sandbox for science modules. Register a model in the Fink MLflow registry and run it on historical ZTF data, in its own Docker image, without touching the broker codebase. It is open to everyone, from the scientific community to amateurs: anyone can publish a model, and anyone can use it.
Roadmap
Fink AI currently runs on historical data only. The goal is to run user models on the live alert stream.
Requirements
| To... | You need |
|---|---|
| Run existing models and download the results | fink-client version 12.3.0 or later |
| Register your own model | A Fink MLflow account |
MLflow account creation
Only to create a model
The MLflow account and the access token below are only needed to create and publish a model. To run existing models, go straight to Using the service.
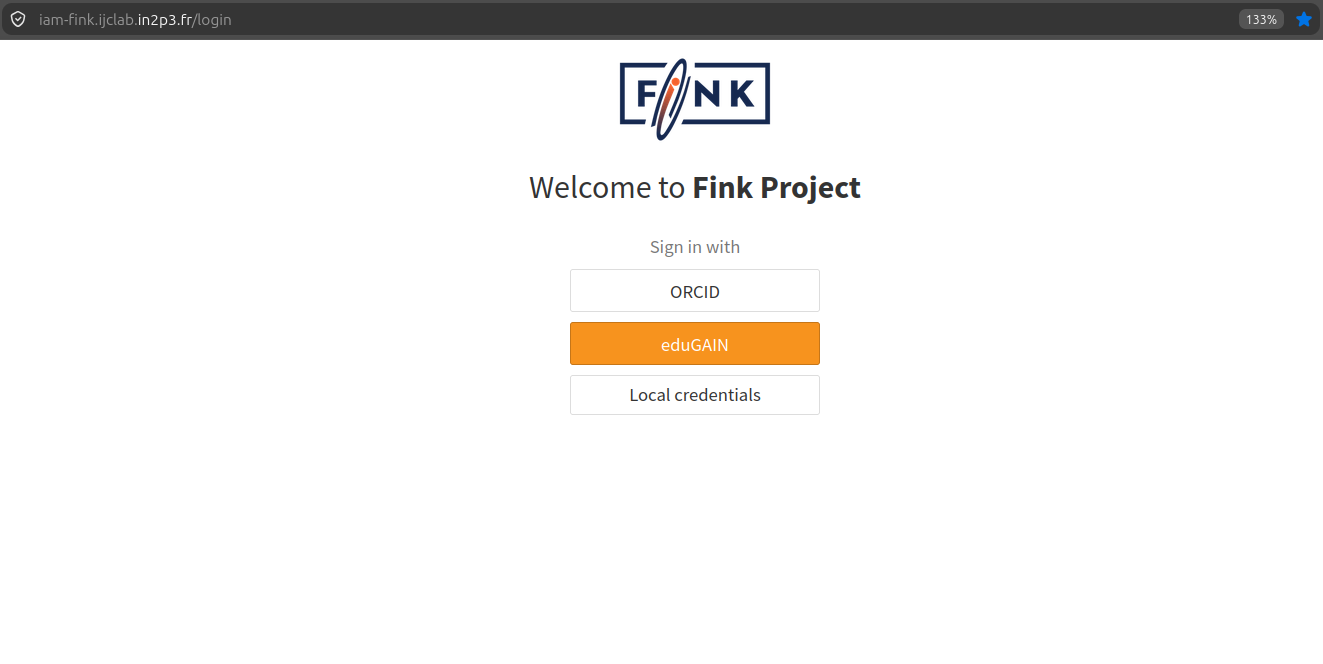
Step 1 Go to mlflow.fink-broker.org and sign in with your ORCID or eduGAIN account:
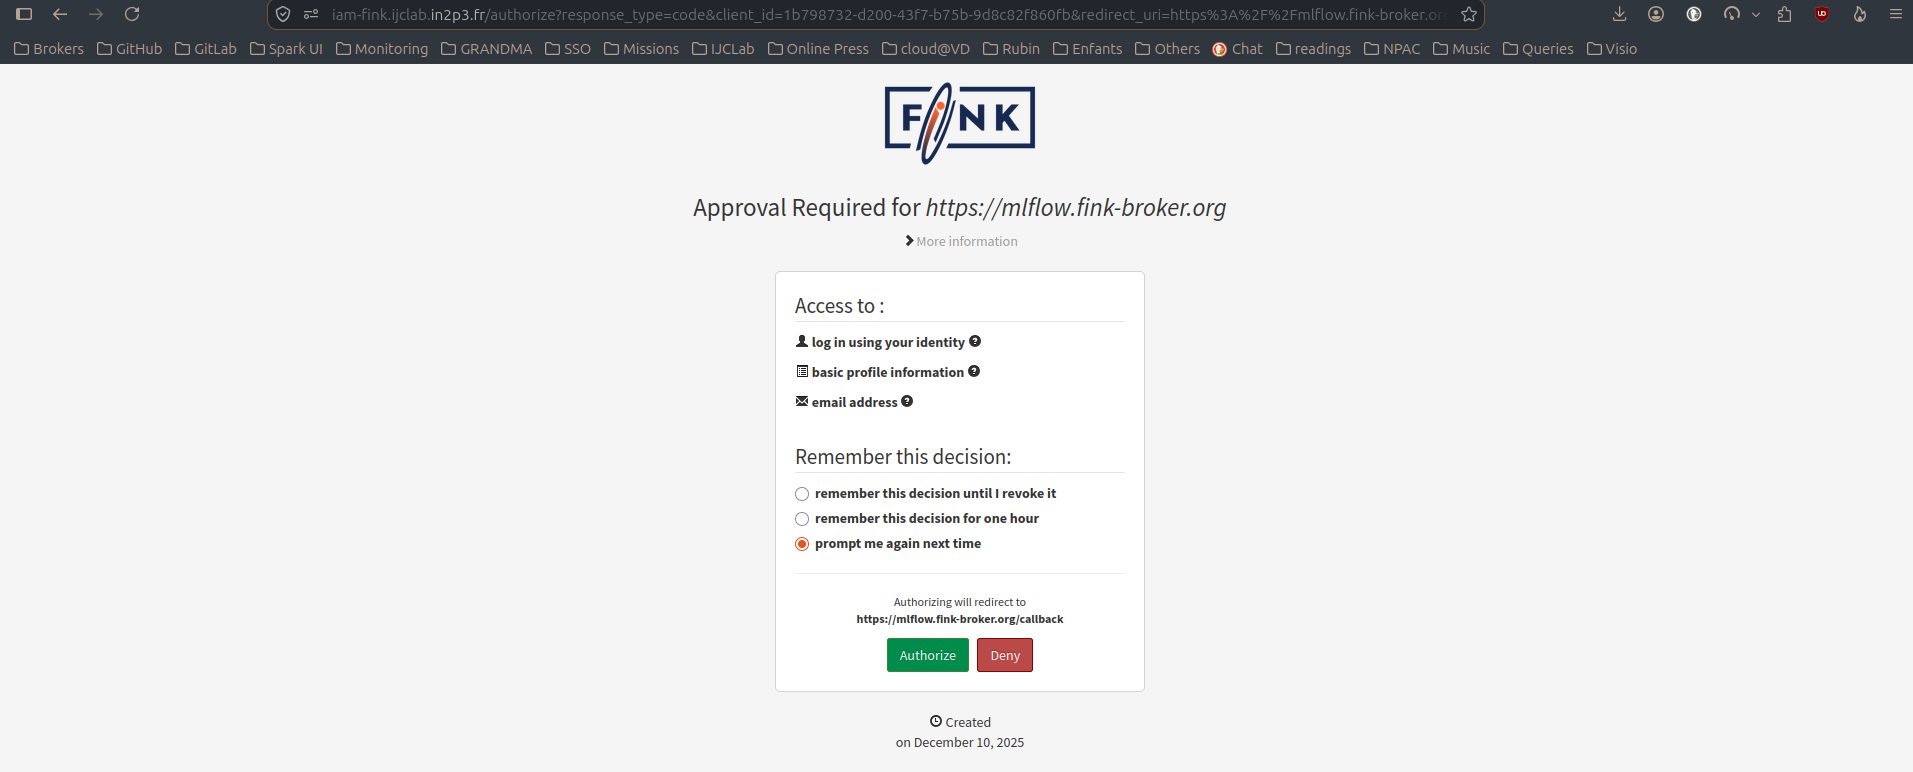
Step 2 Click Authorize to let MLflow use your identity:
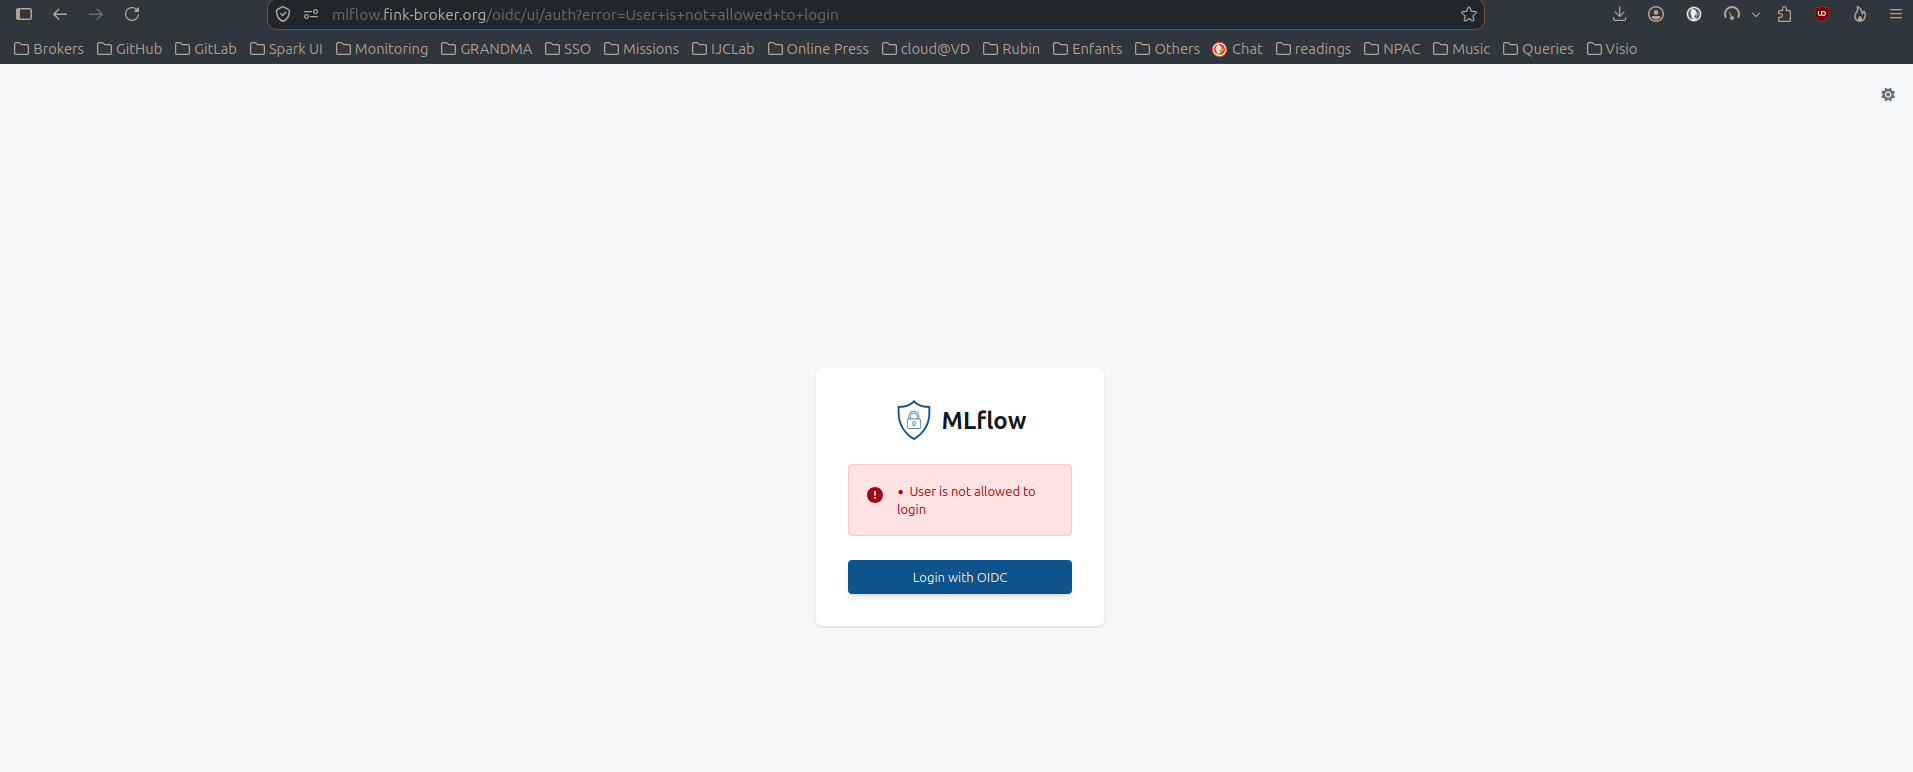
Step 3 The first time, you get this error, because your account has not been granted access yet:
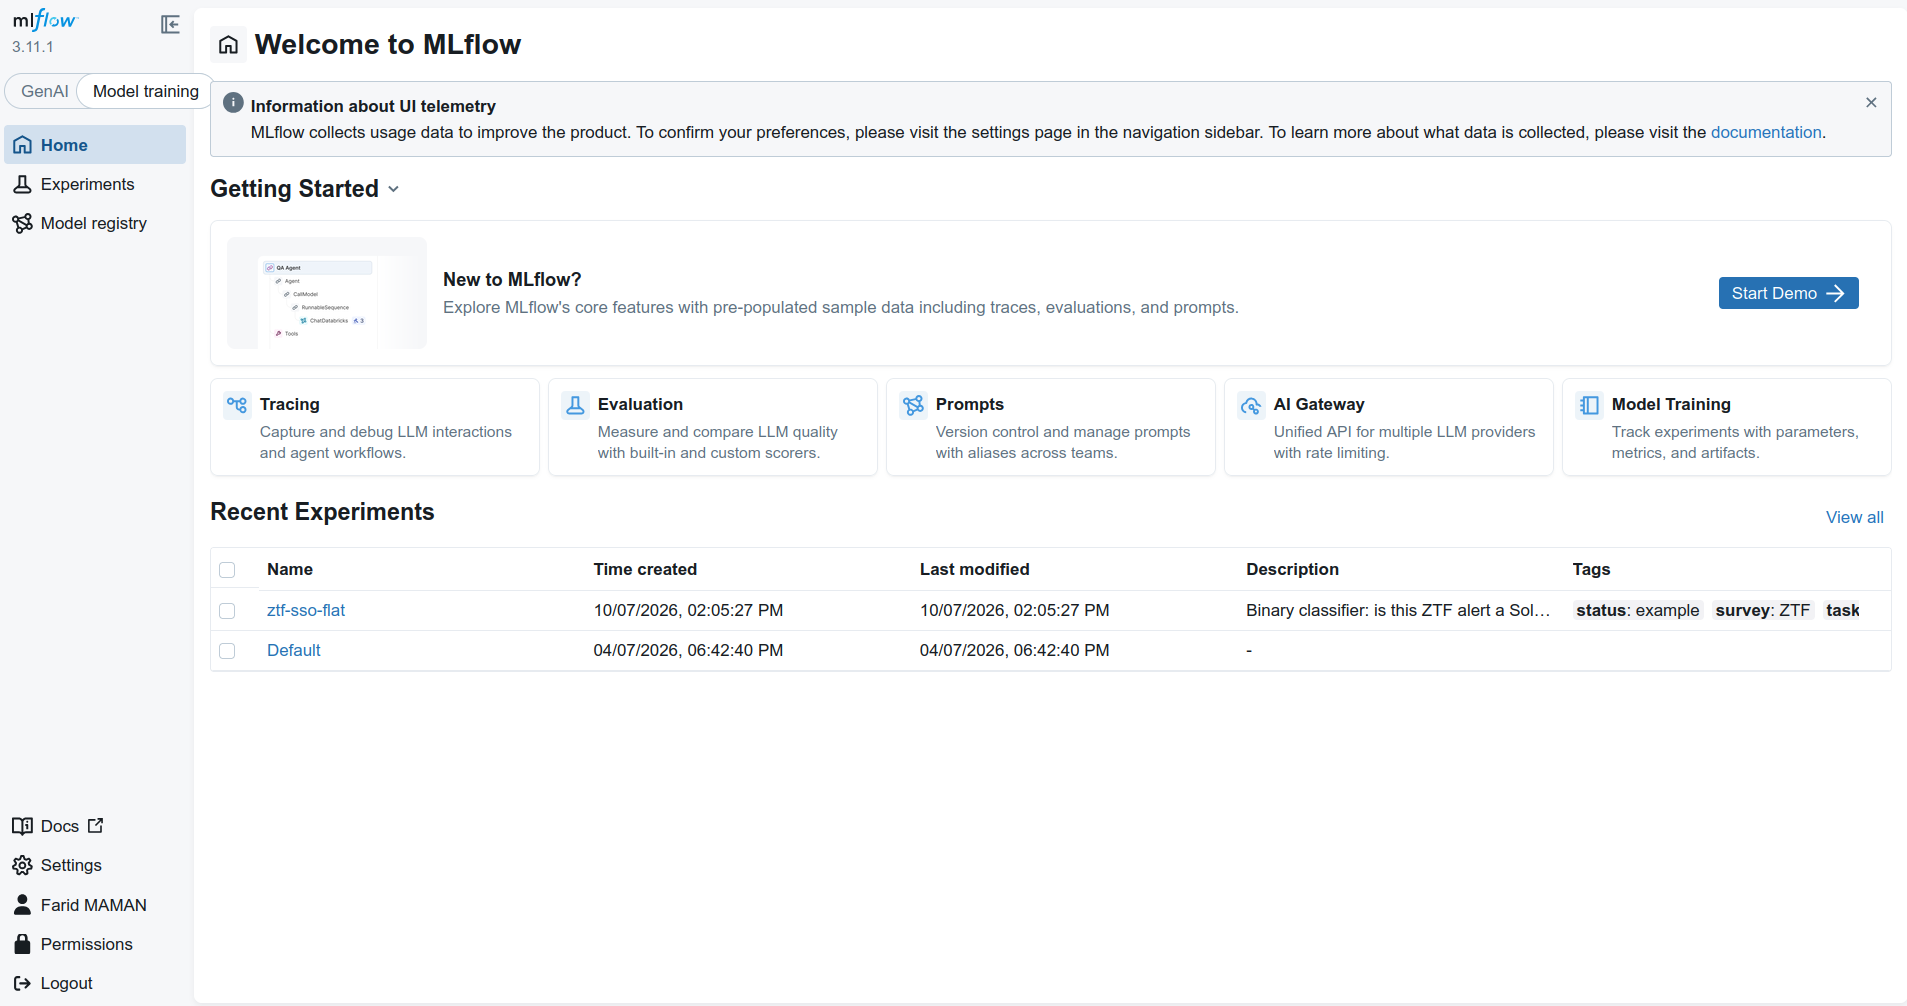
Step 4 Once you have been granted access, repeat the same steps (if you do not hear from us, leave a message on Slack or email). You land on the MLflow welcome page:
MLflow authentication
Open your User Page:
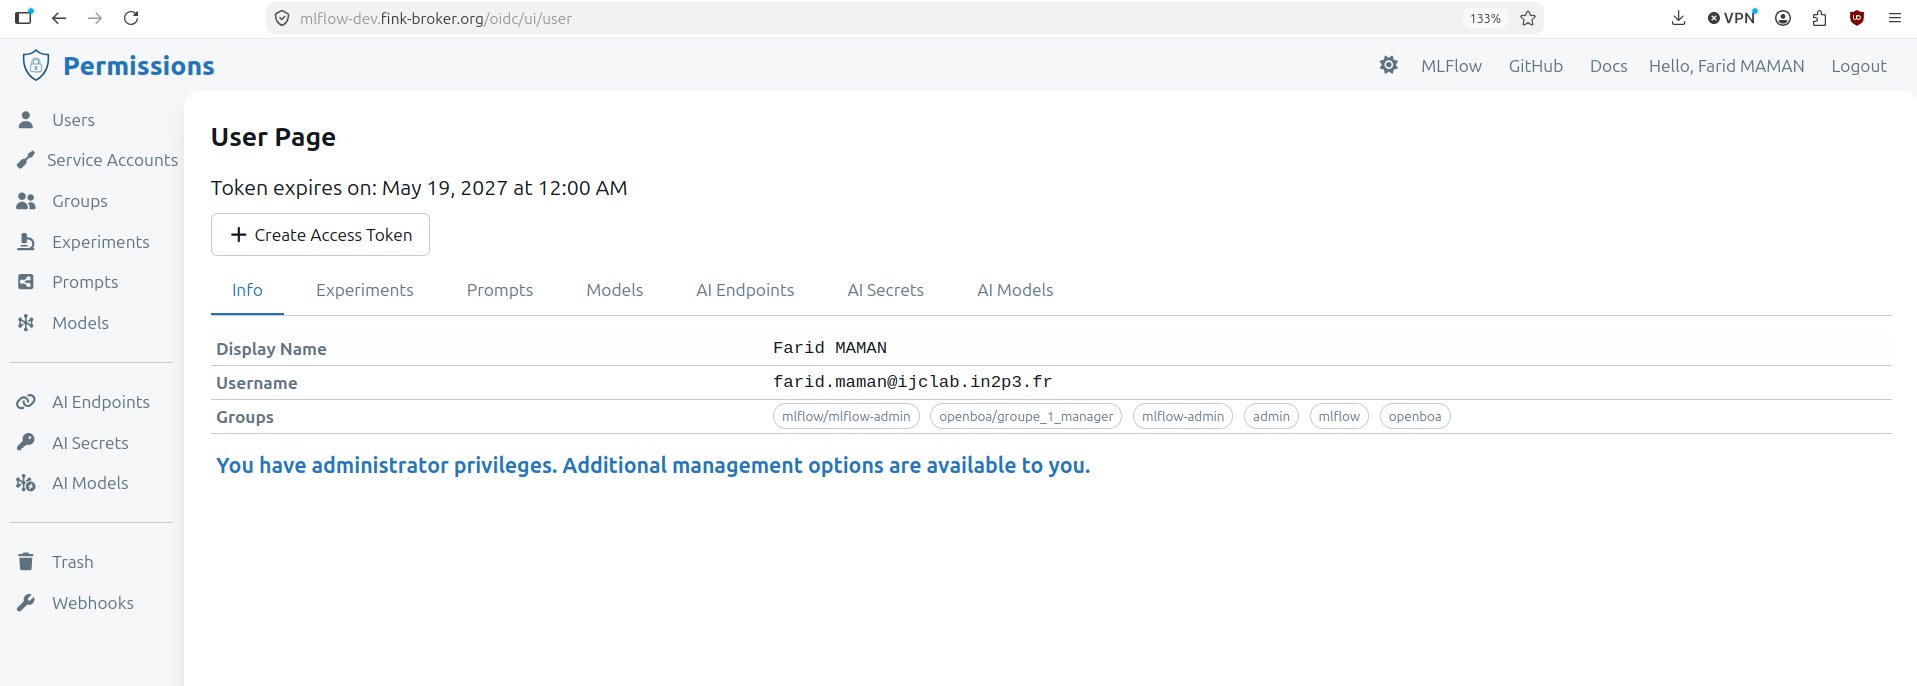
Click + Create Access Token:
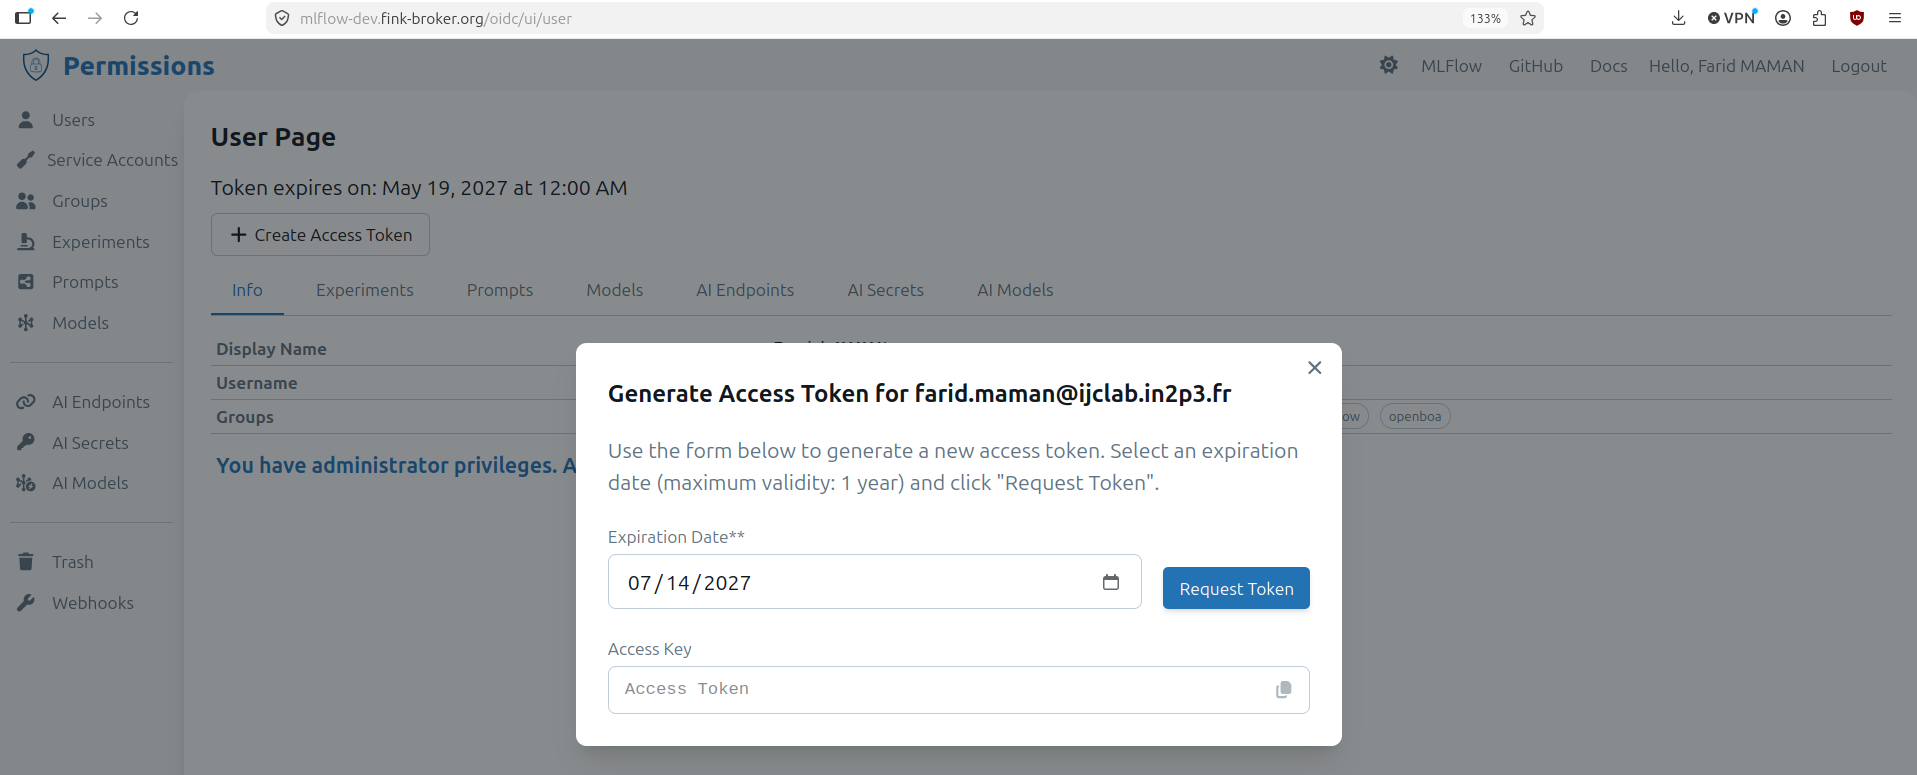
This token is what your code or program uses to log your model to MLflow. Before running it, set the tracking URI, your username (shown on the User Page) and the token as password:
export MLFLOW_TRACKING_URI=https://mlflow.fink-broker.org
export MLFLOW_TRACKING_USERNAME=your_username
export MLFLOW_TRACKING_PASSWORD=your_access_token
Using the service
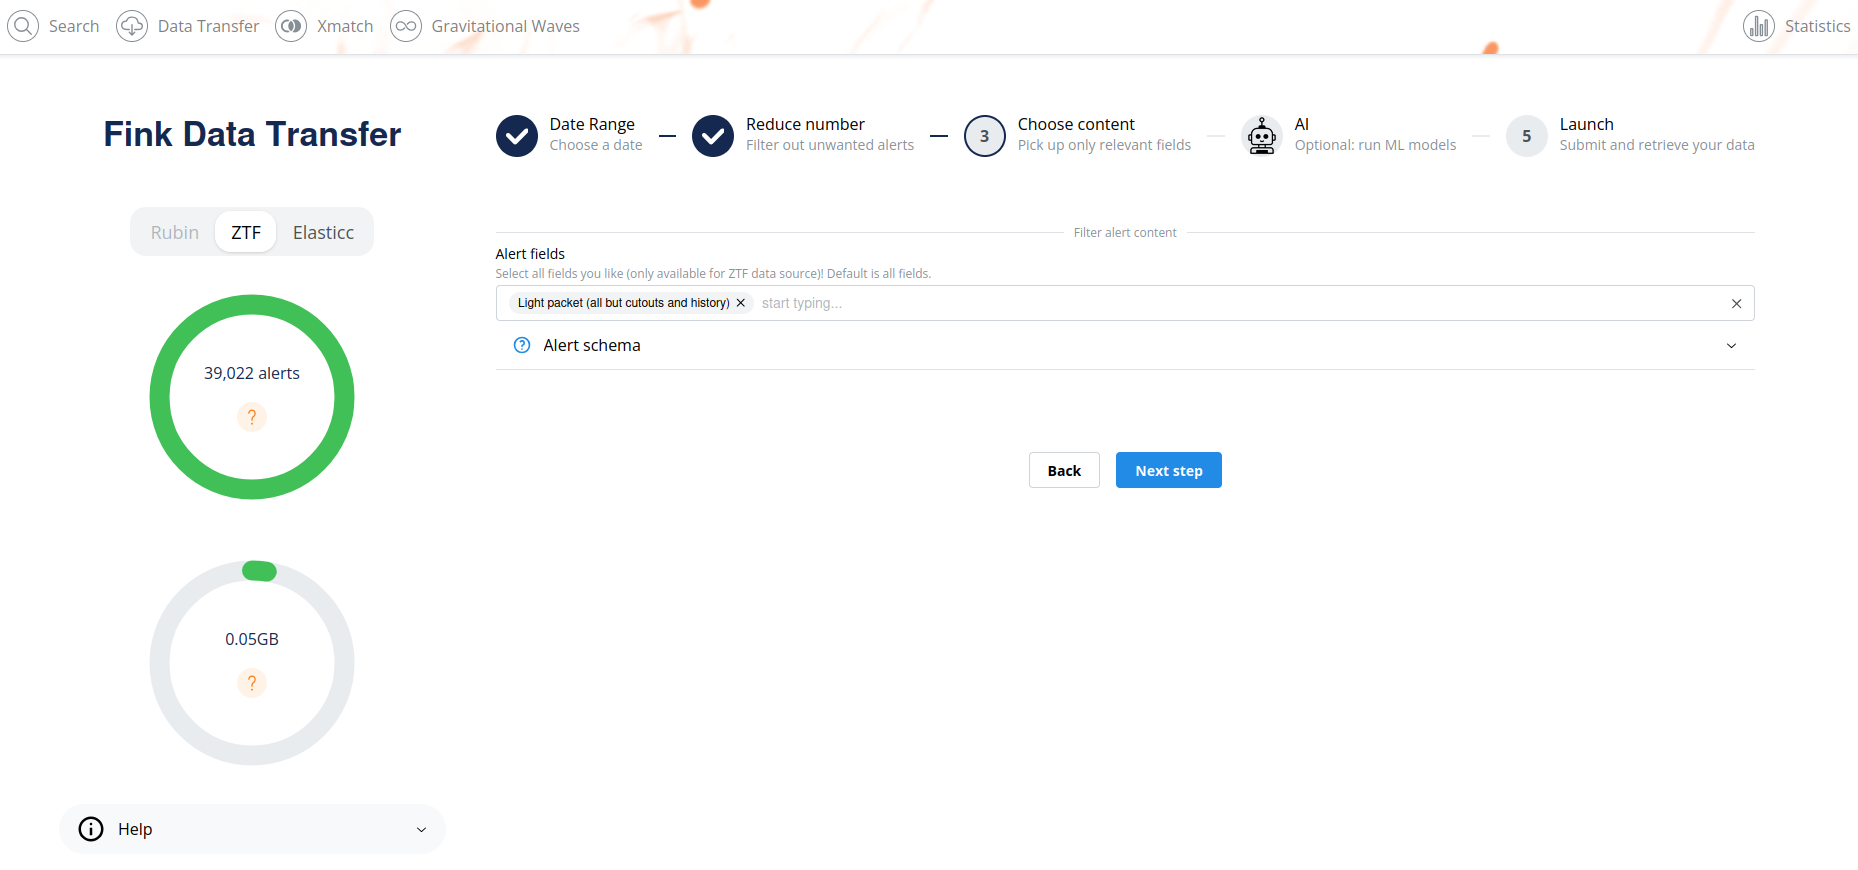
Fink AI is the Data Transfer form with one extra step, step 4. Steps 1 to 3 are unchanged, see Defining your query.
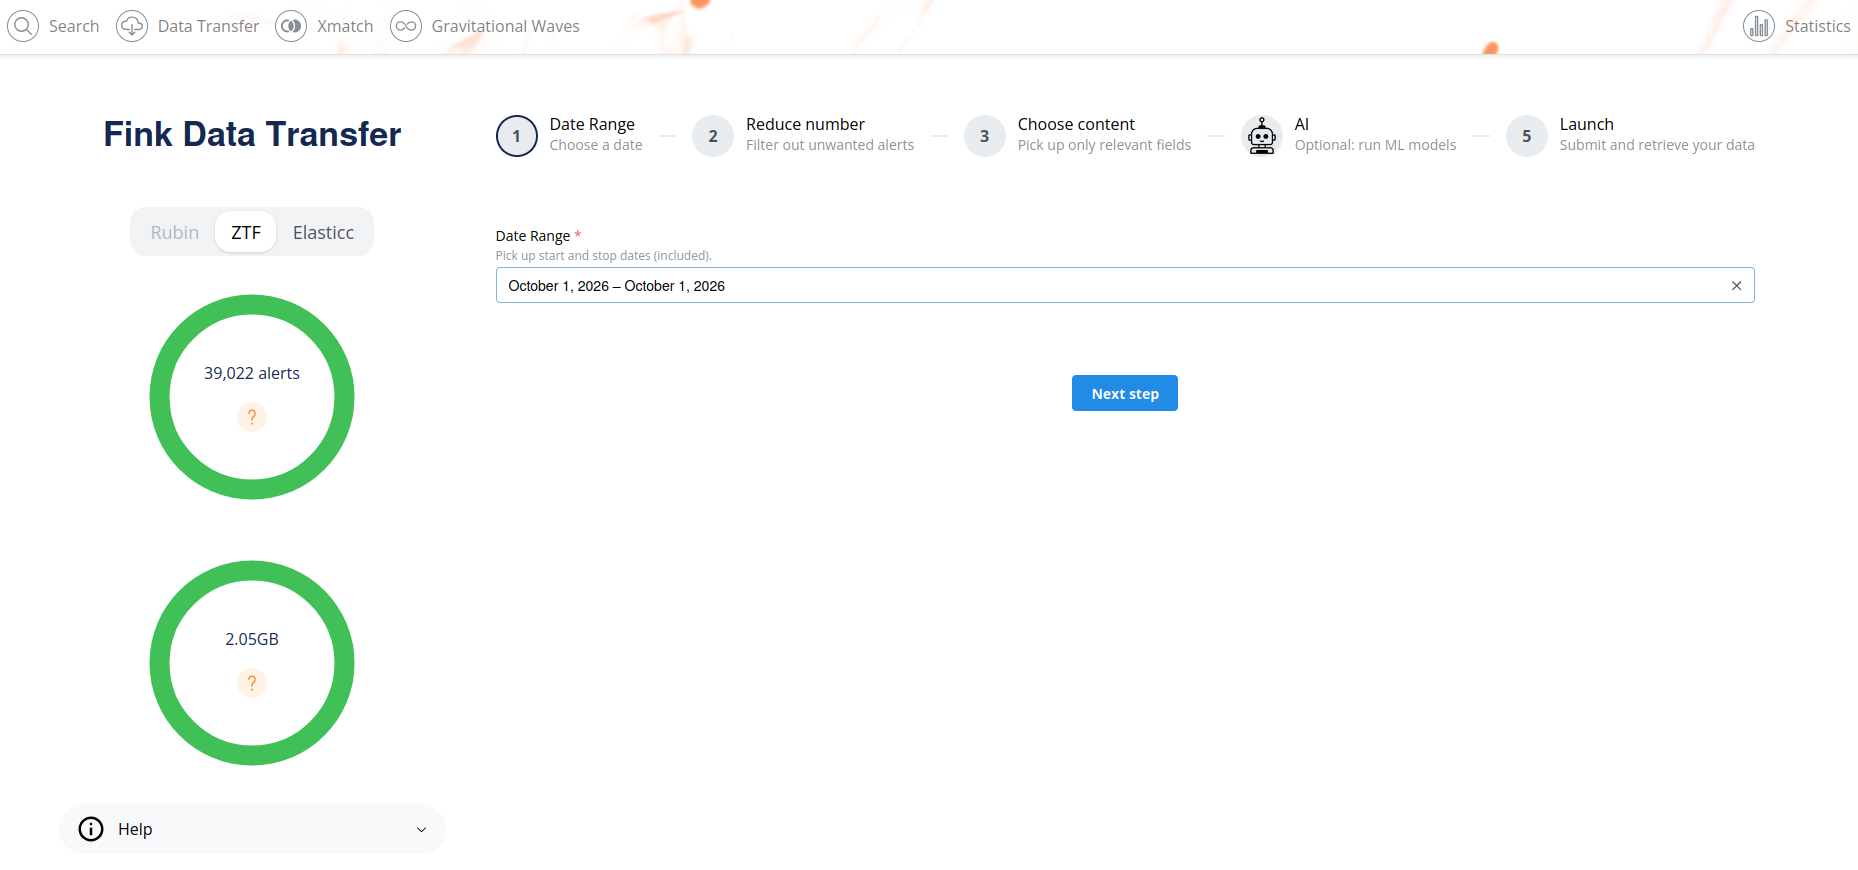
Step 1 Choose the dates:
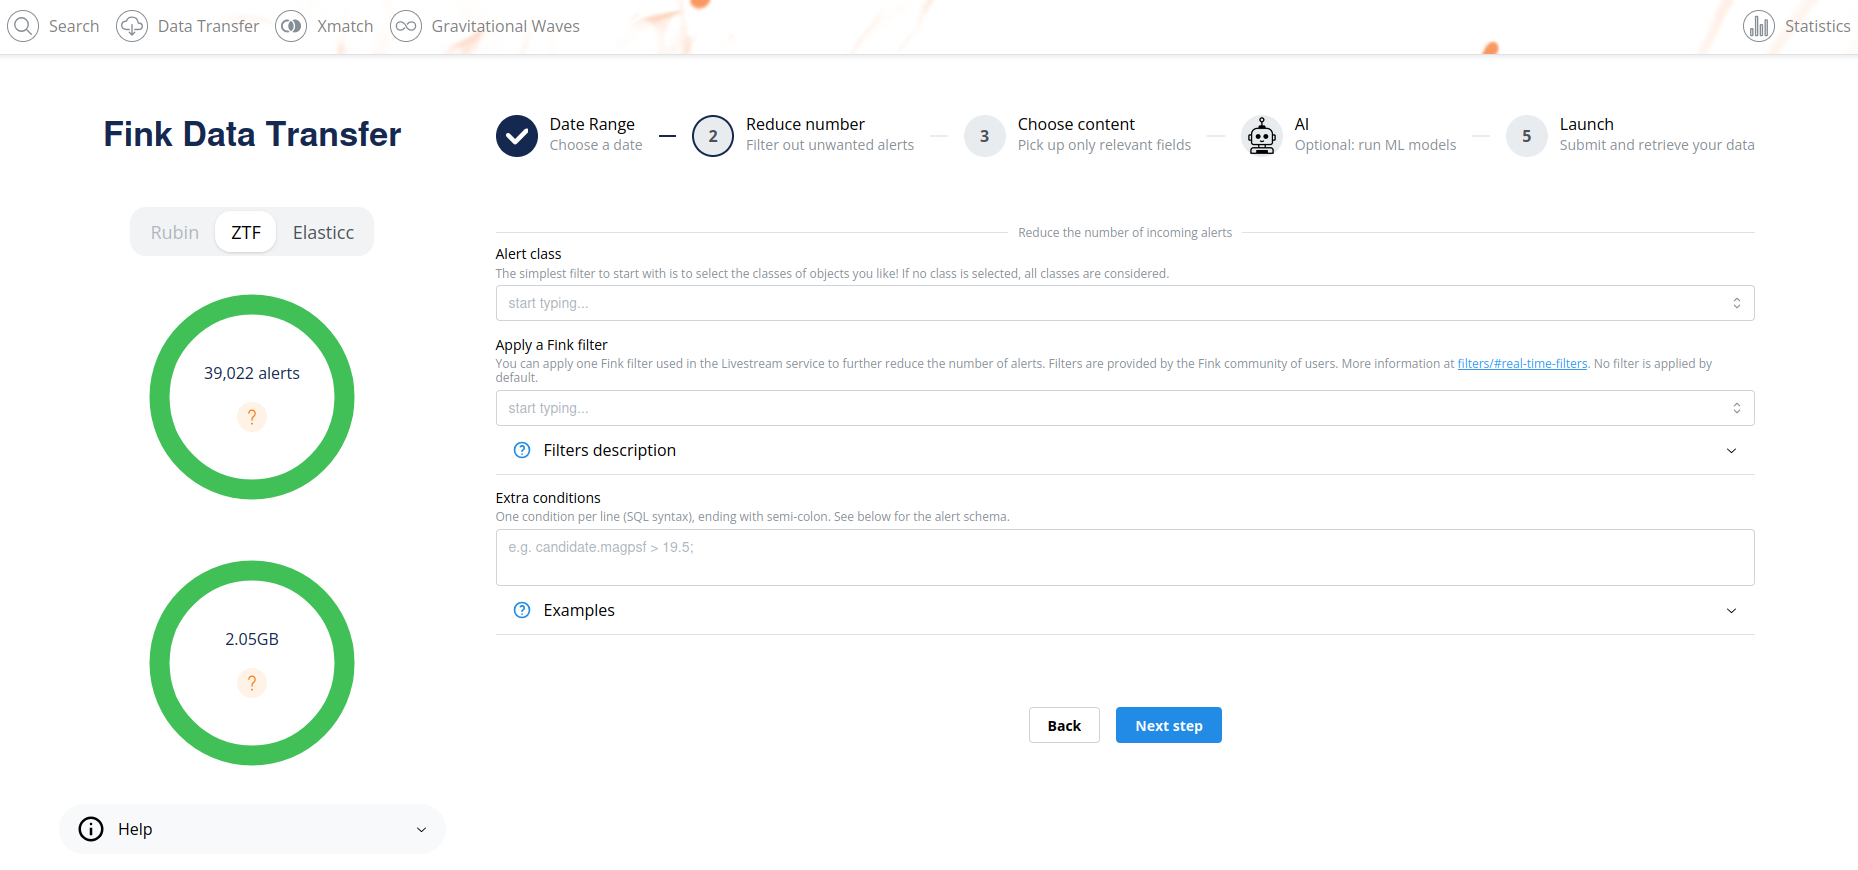
Step 2 Filter alerts (optional):
Step 3 You do not need to choose the output fields -- Medium Content will always be selected.
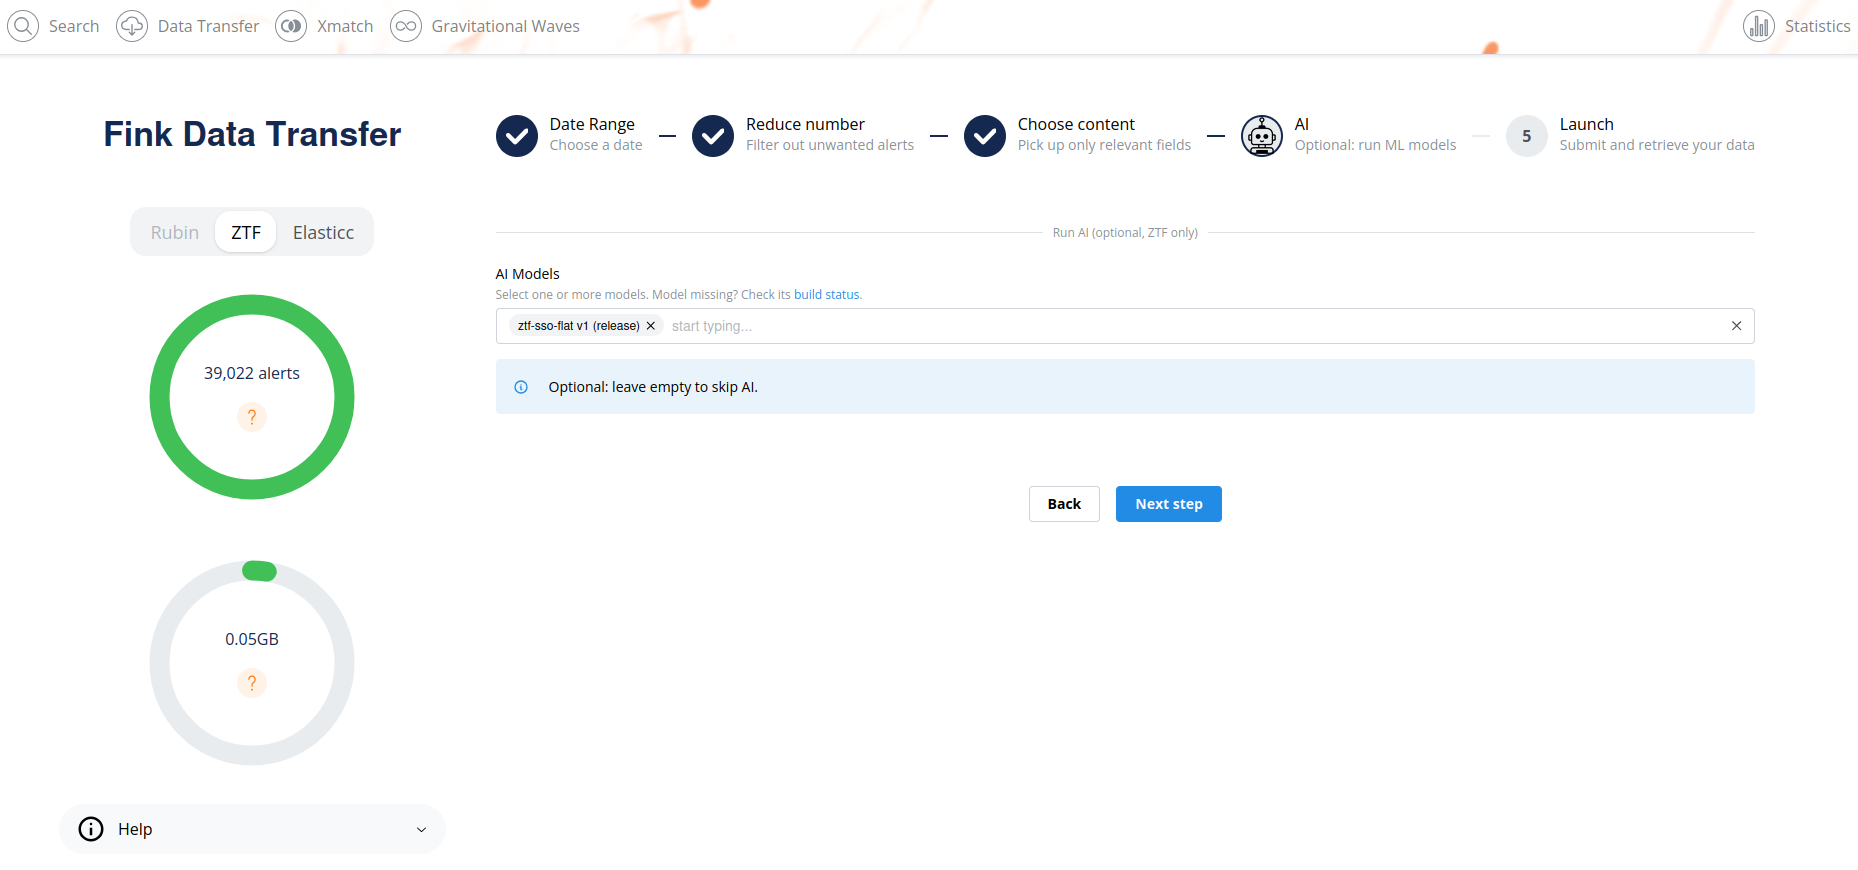
Step 4 Select one or more AI models, listed with their version and alias. Leave the field empty for a standard data transfer.
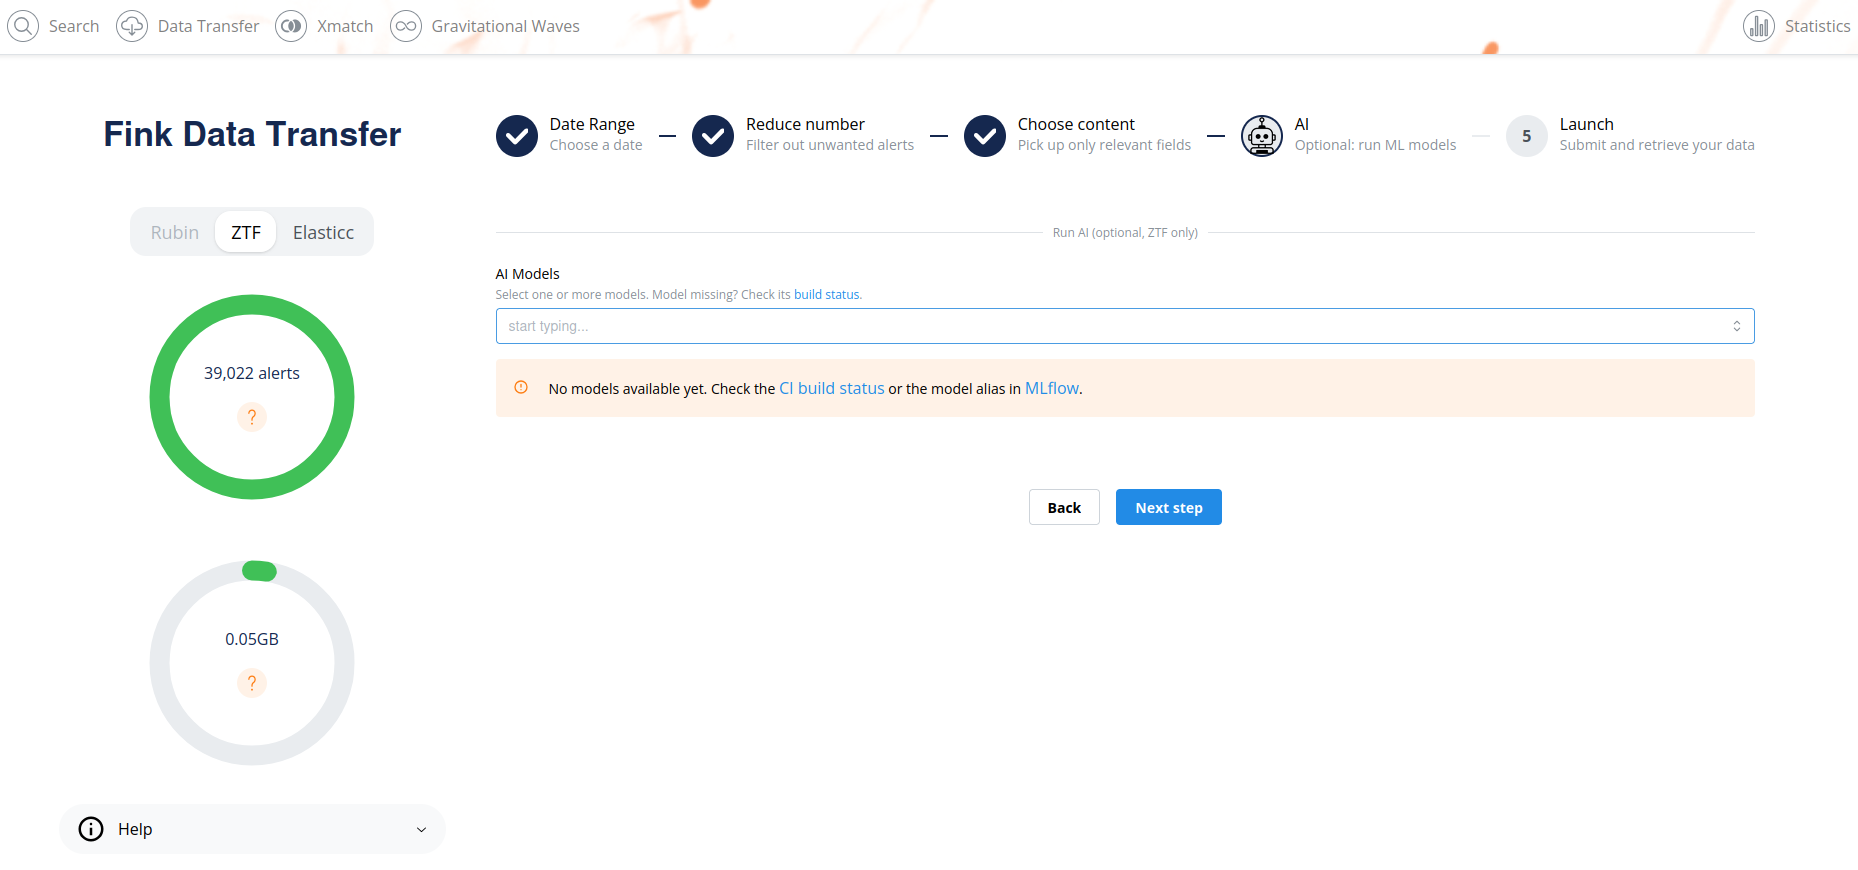
If no model is available yet, you see this message instead (see Publishing a model):
Step 5 Submit the job. The page is the same as for a standard data transfer: it displays your topic and the command to retrieve your data.
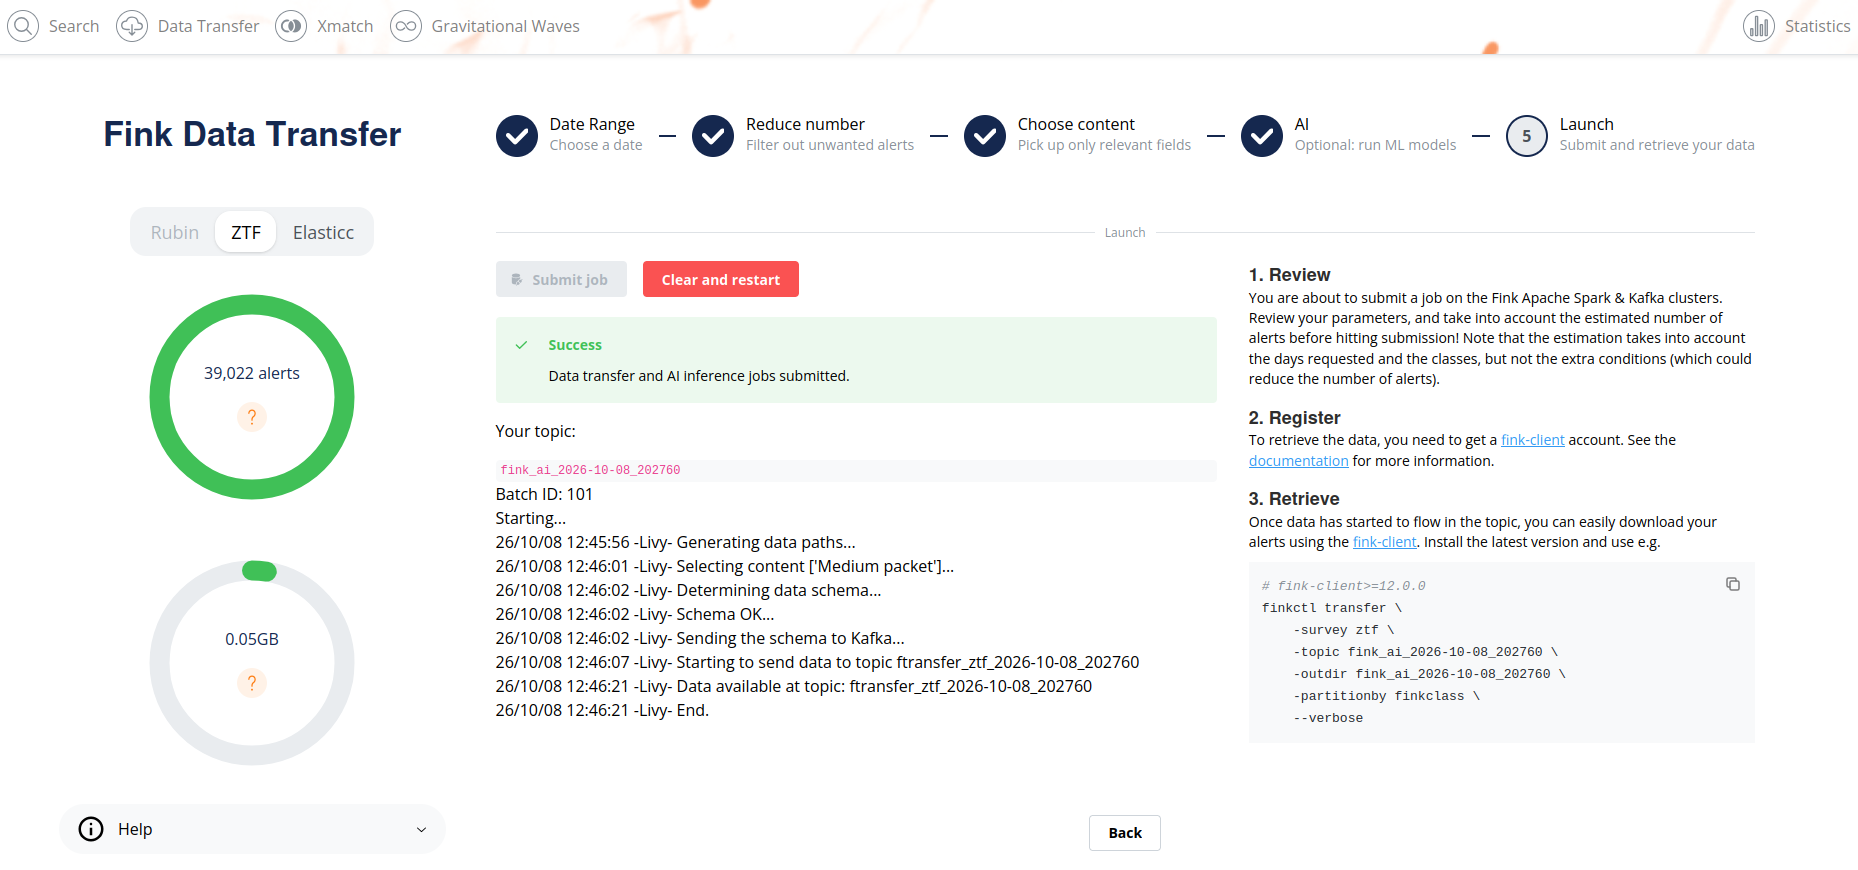
finkctl transfer \
    -survey ztf \
    -topic fink_ai_2026-10-08_202760 \
    -outdir fink_ai_2026-10-08_202760 \
    -partitionby finkclass \
    --verbose
Data is retained for 7 days.
Reading the results
The output folder contains parquet files, partitioned by finkclass. They hold the alert fields chosen at step 3, plus one column, model_predictions:
import polars as pl

df = pl.read_parquet(
    "fink_ai_2026-10-08_202760",
    columns=["objectId", "candid", "finkclass", "model_predictions"],
)

df.head(2)
       objectId               candid  finkclass         model_predictions
0  ZTF26absuzhq  3560140304115015058  Ambiguous  [{"ztf-sso-flat@1",1.0}]
1  ZTF26abuxdqd  3560118260615015042  Ambiguous  [{"ztf-sso-flat@1",1.0}]
Polars or Pandas?
Polars is a DataFrame library like Pandas, only faster. If you prefer Pandas, pd.read_parquet("fink_ai_2026-10-08_202760") reads the same folder.
model_predictions is a list with one {model, prediction} entry per selected model, where model is name@version. To get one row per model, with two flat columns model and prediction:
df = df.explode("model_predictions").unnest("model_predictions")

df.head(2)
       objectId               candid  finkclass           model  prediction
0  ZTF26absuzhq  3560140304115015058  Ambiguous  ztf-sso-flat@1         1.0
1  ZTF26abuxdqd  3560118260615015042  Ambiguous  ztf-sso-flat@1         1.0
Creating a model
A model is two Docker images chained by the pipeline:
flowchart LR
    A["ZTF alerts<br/>(AVRO)"] --> P["<b>preprocessing Job</b><br/>extracts the feature vector"]
    P -- "JSON {objectId, candid, features}" --> M["<b>model Job</b><br/>calls MLflow /invocations"]
    M -- "predictions" --> K["fink_ai_*<br/>(Kafka topic)"]
You provide two things, logged in the same MLflow run:
- The preprocessing: a
preprocessing.pyfile with apre_processing(alert)function that turns a raw alert into a list of floats, plus arequirements.txtif it needs dependencies. - The model: any model type supported by MLflow (scikit-learn, PyTorch, TensorFlow, ...), with any Python version, since each model runs in its own container. There is no GPU for now.
CI builds both images for you.
New to MLflow?
The model template below is all you need. If you want to learn more about MLflow, you can have a look at the tutorial notebooks.
Step 1 Install the model template. It contains an example preprocessing, a training notebook and the fink-model command:
git clone https://github.com/astrolabsoftware/fink-ai-model-template.git
cd fink-ai-model-template
pip install -e .
Step 2 Download training alerts with the Data Transfer service. Select the same content as the one you will choose in Fink AI: pre_processing() receives exactly what you selected, during training and in production.
Step 3 Write the preprocessing in preprocessing/preprocessing.py. It defines the names of the features, and a function that turns one alert (a dict) into one float per name:
import math

FEATURE_NAMES = ["magpsf", "sigmapsf", "fid"]


def pre_processing(alert):
    """Return the feature vector of one alert, in the order of FEATURE_NAMES."""
    features = []
    for name in FEATURE_NAMES:
        try:
            value = float(alert.get(name))
        except (TypeError, ValueError):
            value = 0.0
        features.append(value if math.isfinite(value) else 0.0)
    return features
The preprocessing runs on every alert of the stream, so it must respect three rules:
- It never raises. Real alerts have missing and
Nonefields: return a default value. - It is fast: less than 5 ms per alert on average. No Pandas DataFrame, no file access, no network call.
- The order of
FEATURE_NAMESis the input of the model. After changing the list, train a new model.
Step 4 Check the preprocessing on your alerts. The command prints OK, or the reason of the failure:
Step 5 Train and log the model. Set the MLflow variables, open train.ipynb and edit the marked cells. The notebook relies on three functions:
import fink_model

X, info = fink_model.load_features(ALERTS, columns=["roid"])   # features + label columns
y = (info["roid"] == 3).astype(int)                             # labels

with fink_model.start_run("my-model"):                          # MLflow run
    model.fit(X_train, y_train)
    fink_model.log_model(model)                                 # validated, then uploaded
The model receives the output of pre_processing() and nothing else: any transformation of the features (scaling, selection...) must be part of the model, for instance with a scikit-learn Pipeline.
Each execution creates a new run in MLflow. Nothing is deployed at this stage.
Publishing a model
A model version appears in the selector only once both its images are built.
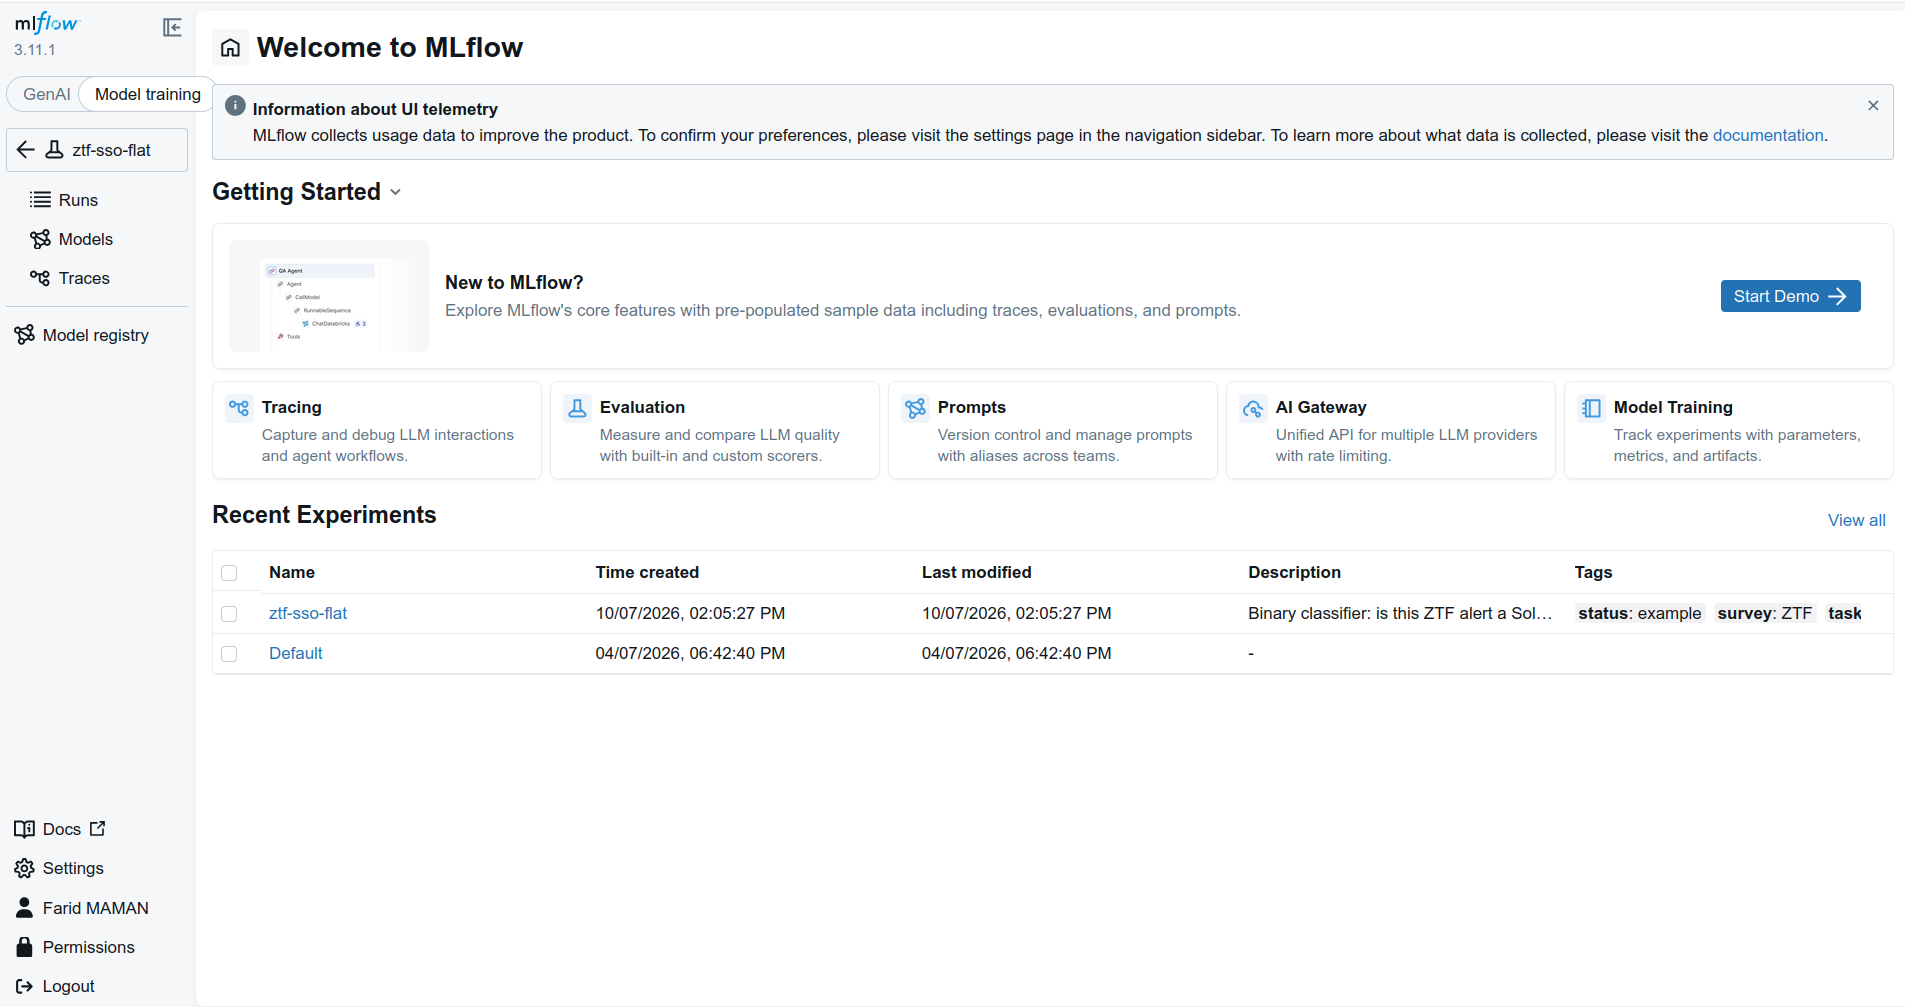
Step 1 In the Fink MLflow UI, open your experiment (ztf-sso-flat in this example).
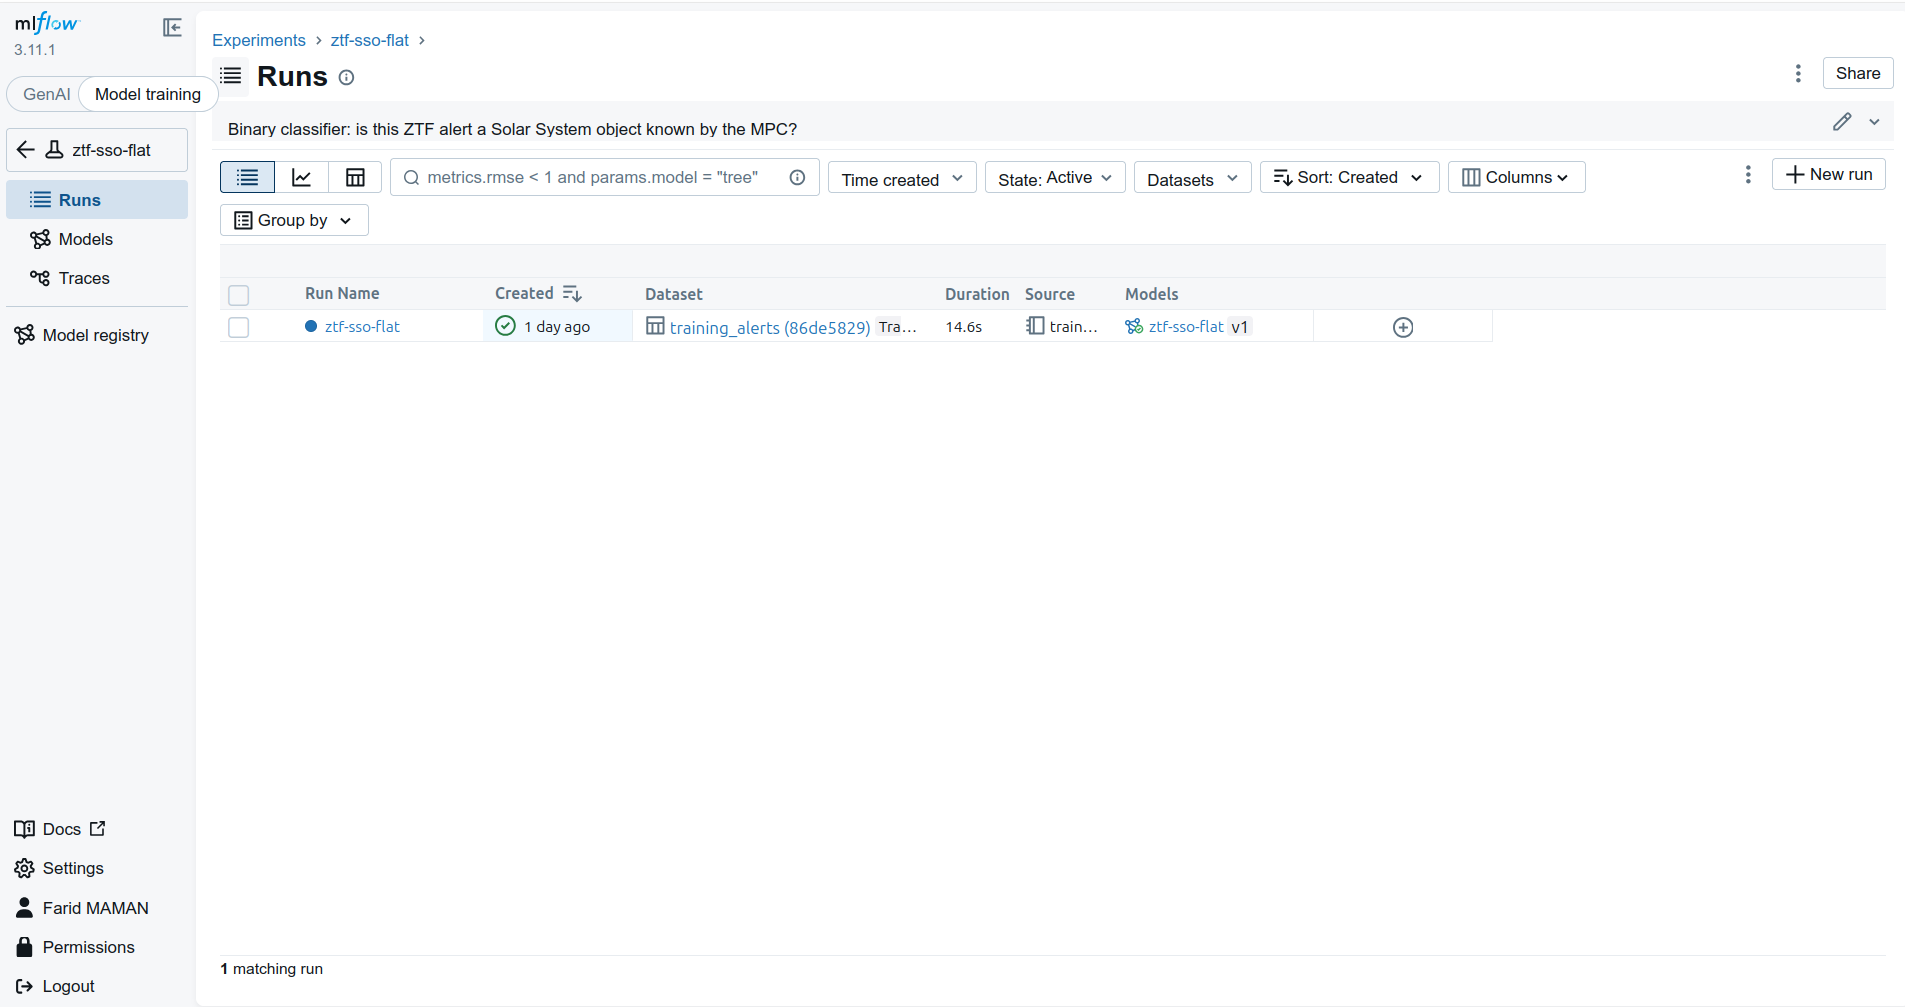
Step 2 Select the run to publish.
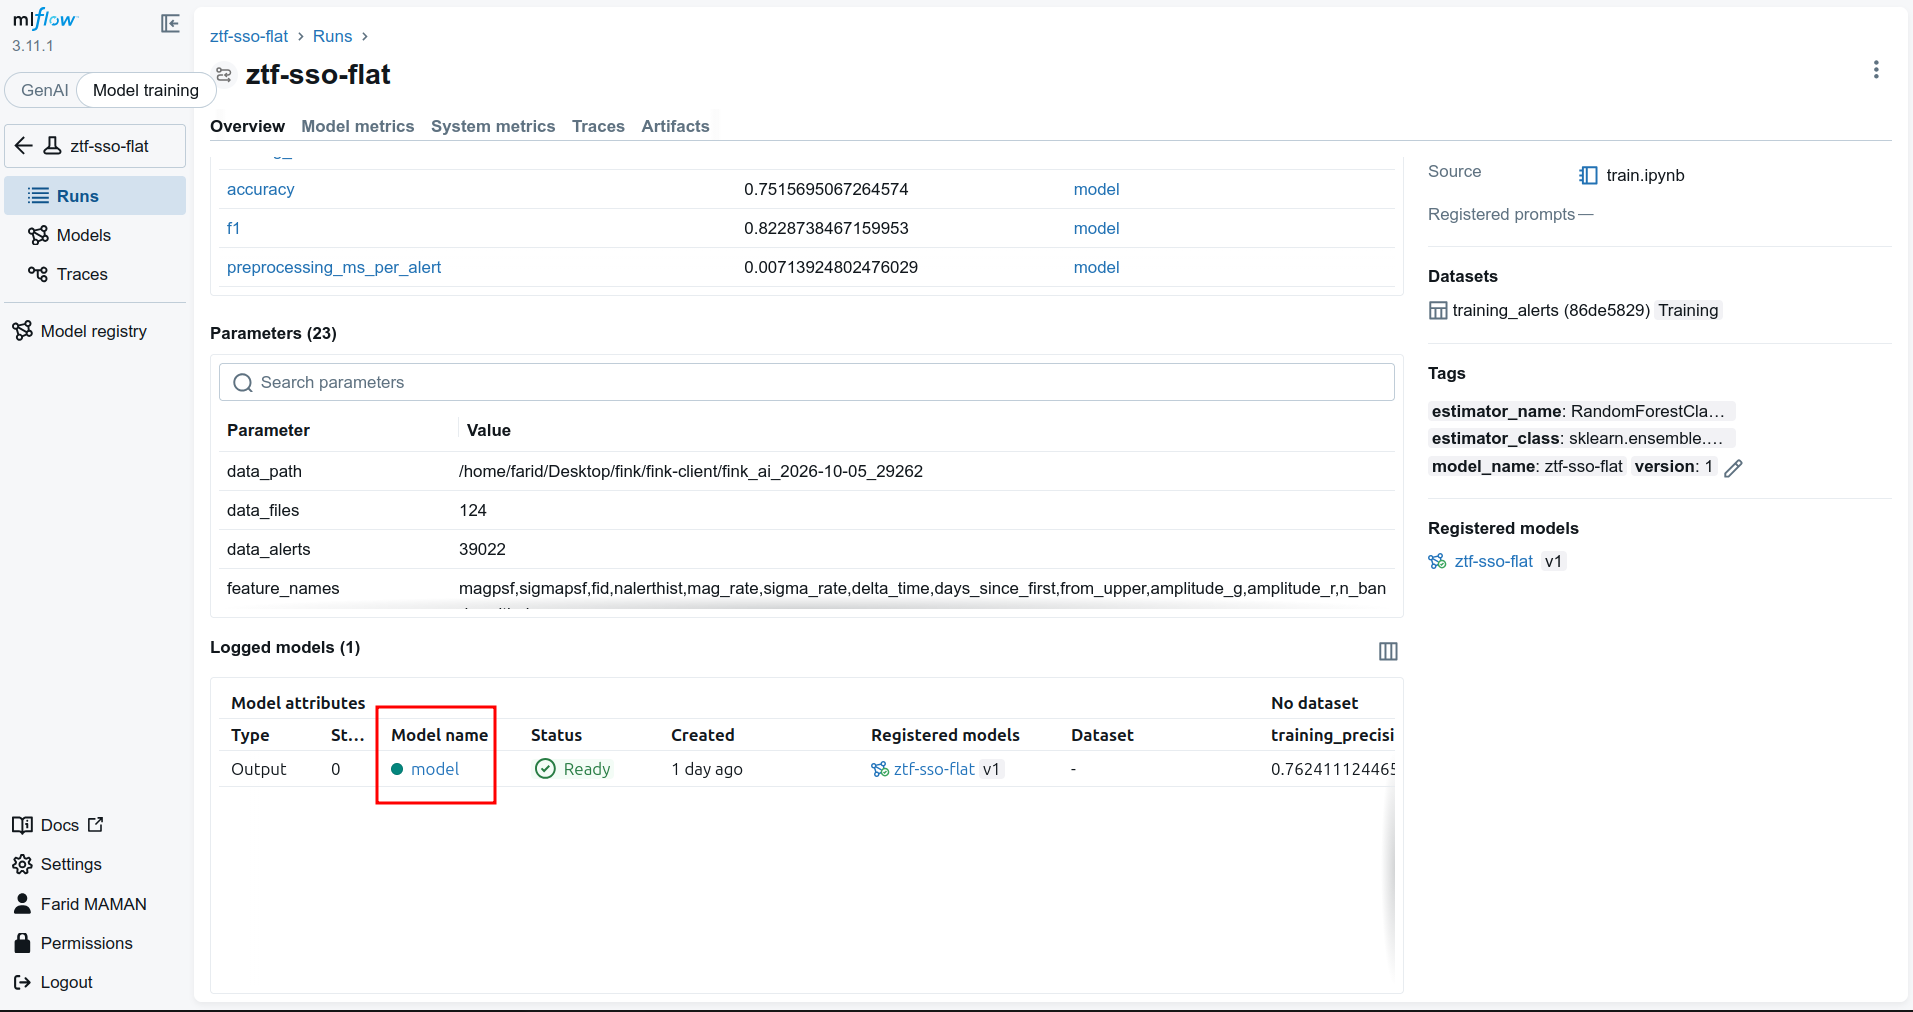
Step 3 Scroll down to Logged models and click on the model name.
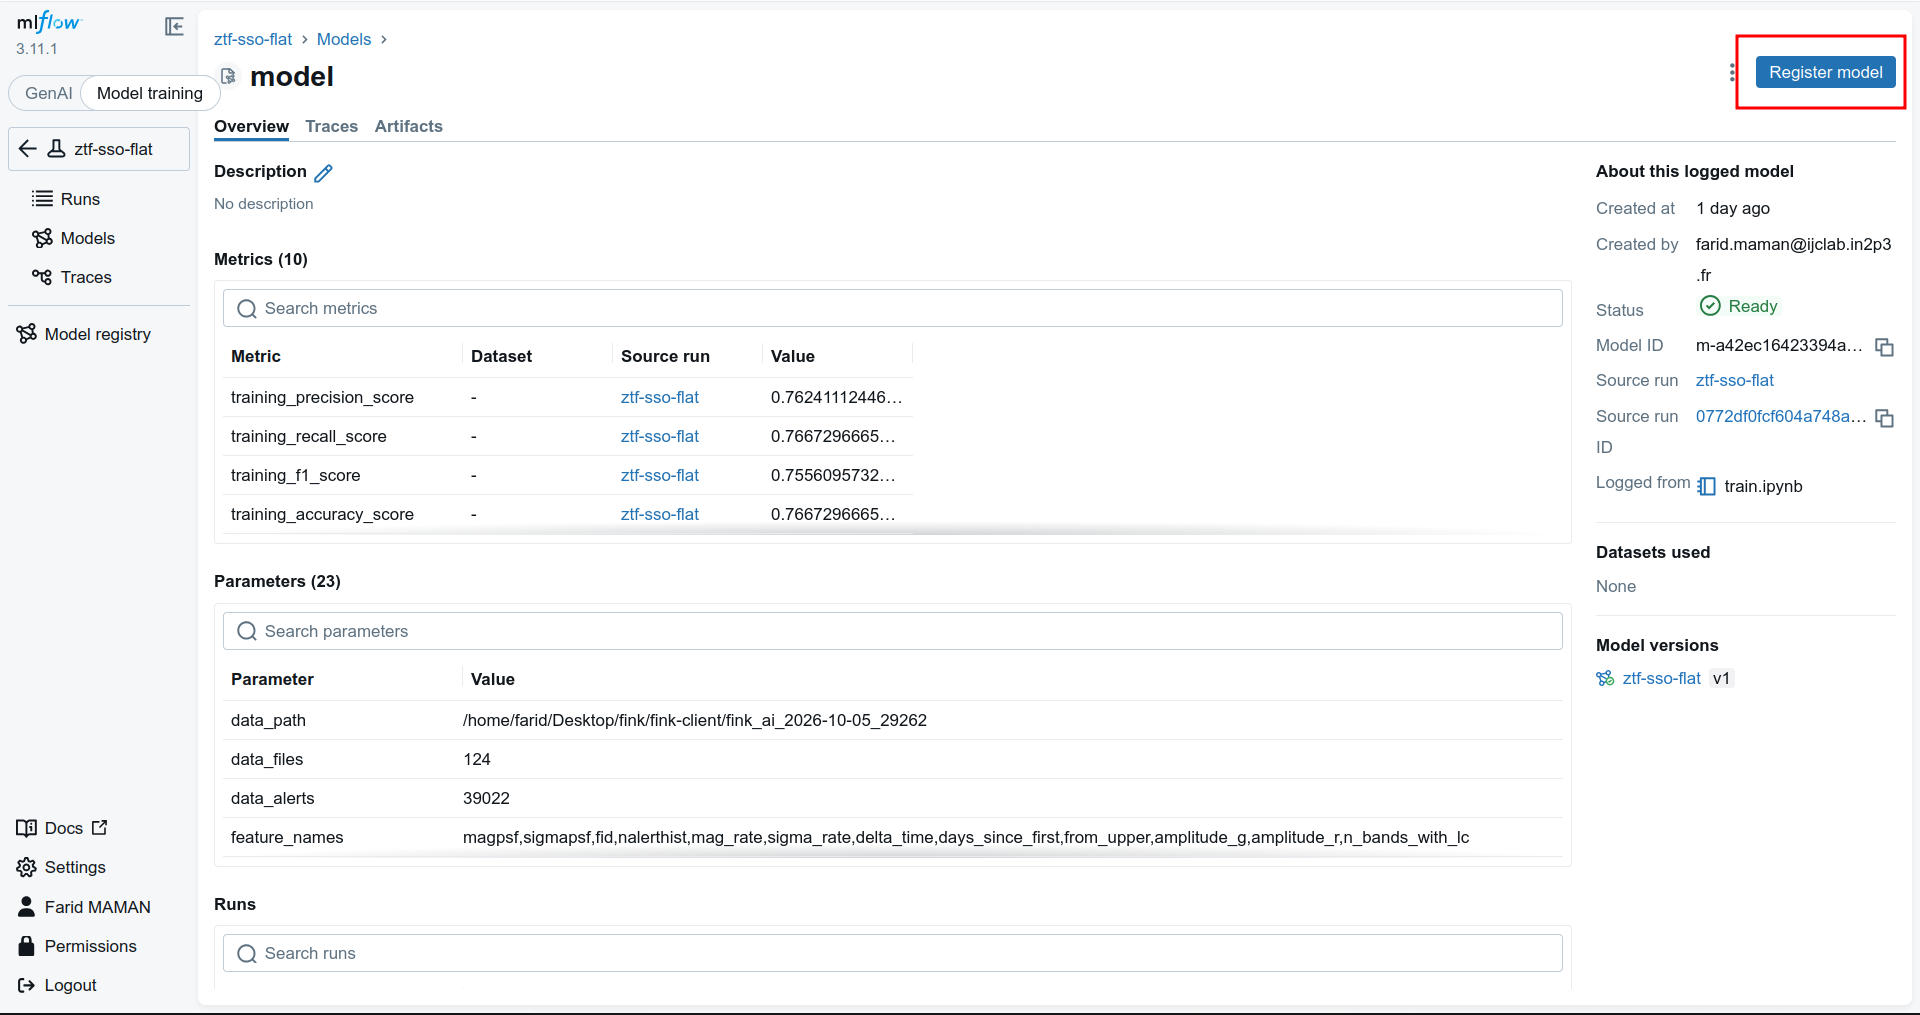
Step 4 Click on Register model. Either create a new registered model, with the same name as the experiment, or select the existing one that matches the experiment you are working on. Each registration creates a new version.
Step 5 Open the new version and give it an alias (release in this example).
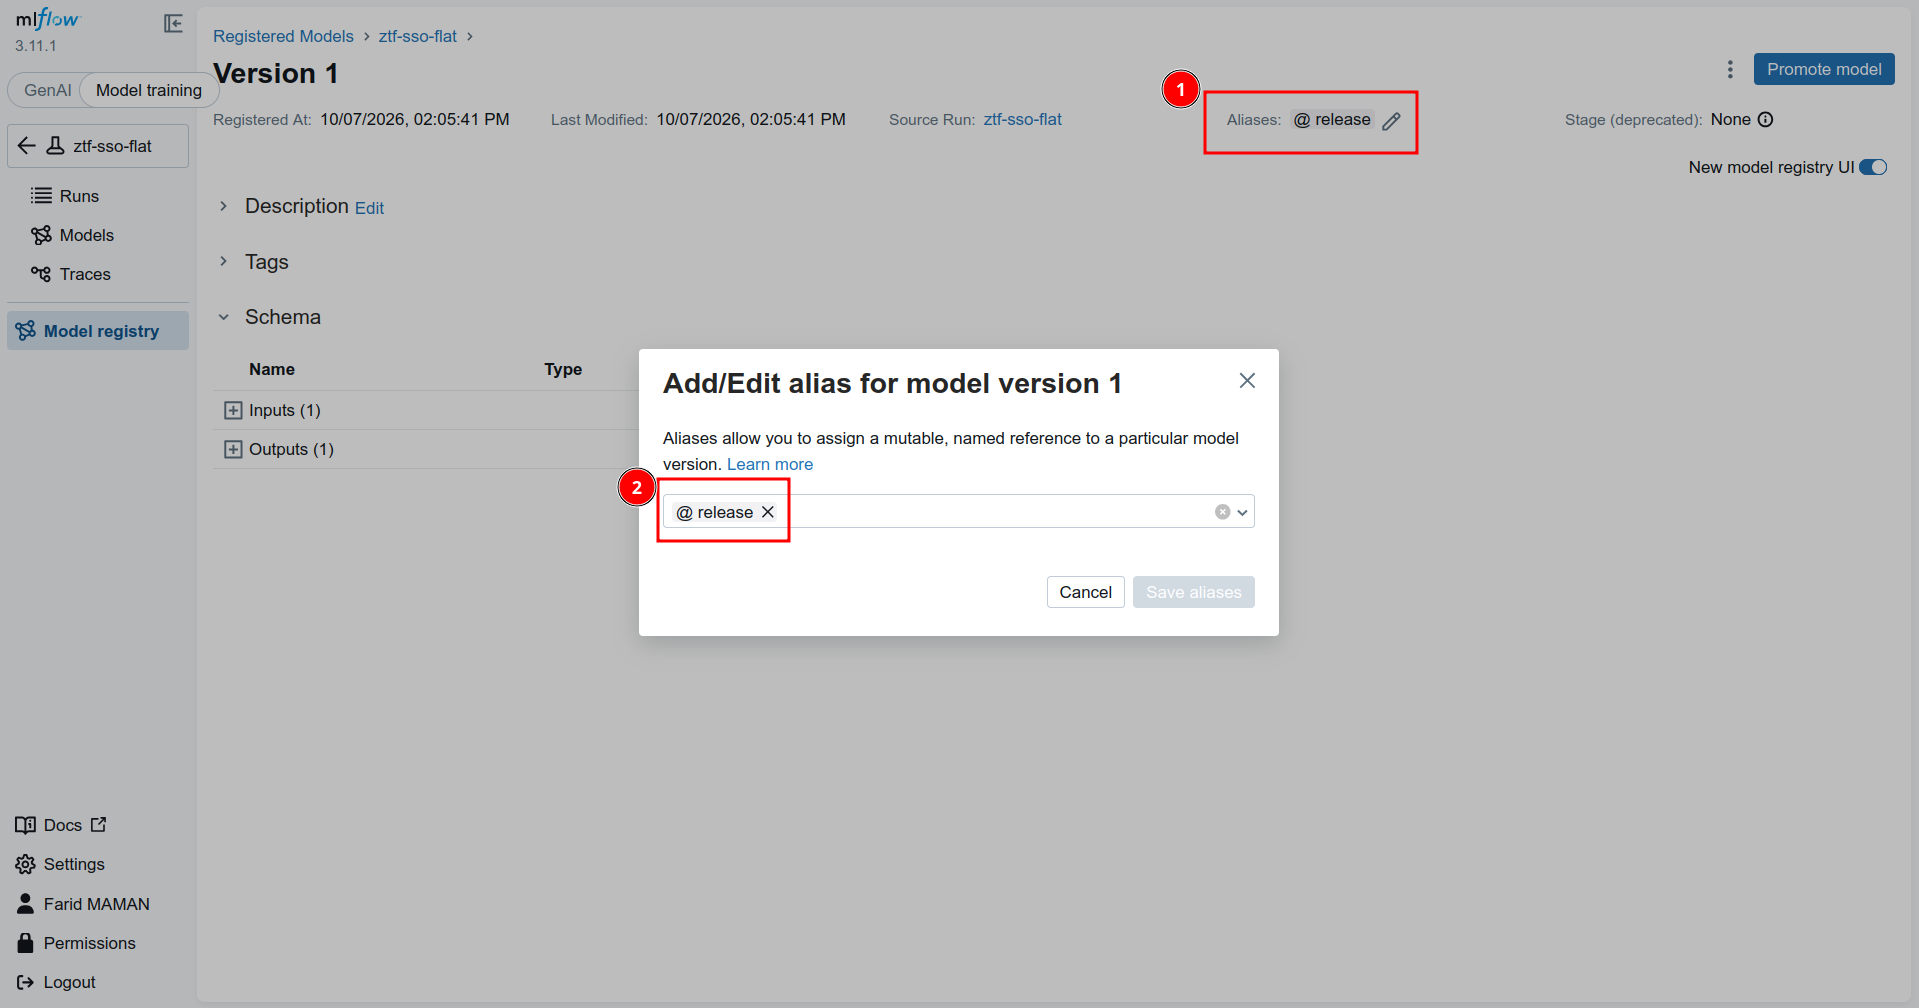
Only three aliases trigger the build
release, challenger and champion. With any other alias, or no alias, nothing is built and the model never appears in the selector.
Step 6 Wait for the build. CI validates the preprocessing, builds both images and pushes them to GHCR. It takes about 30 minutes; follow it in the GitHub Actions runs.
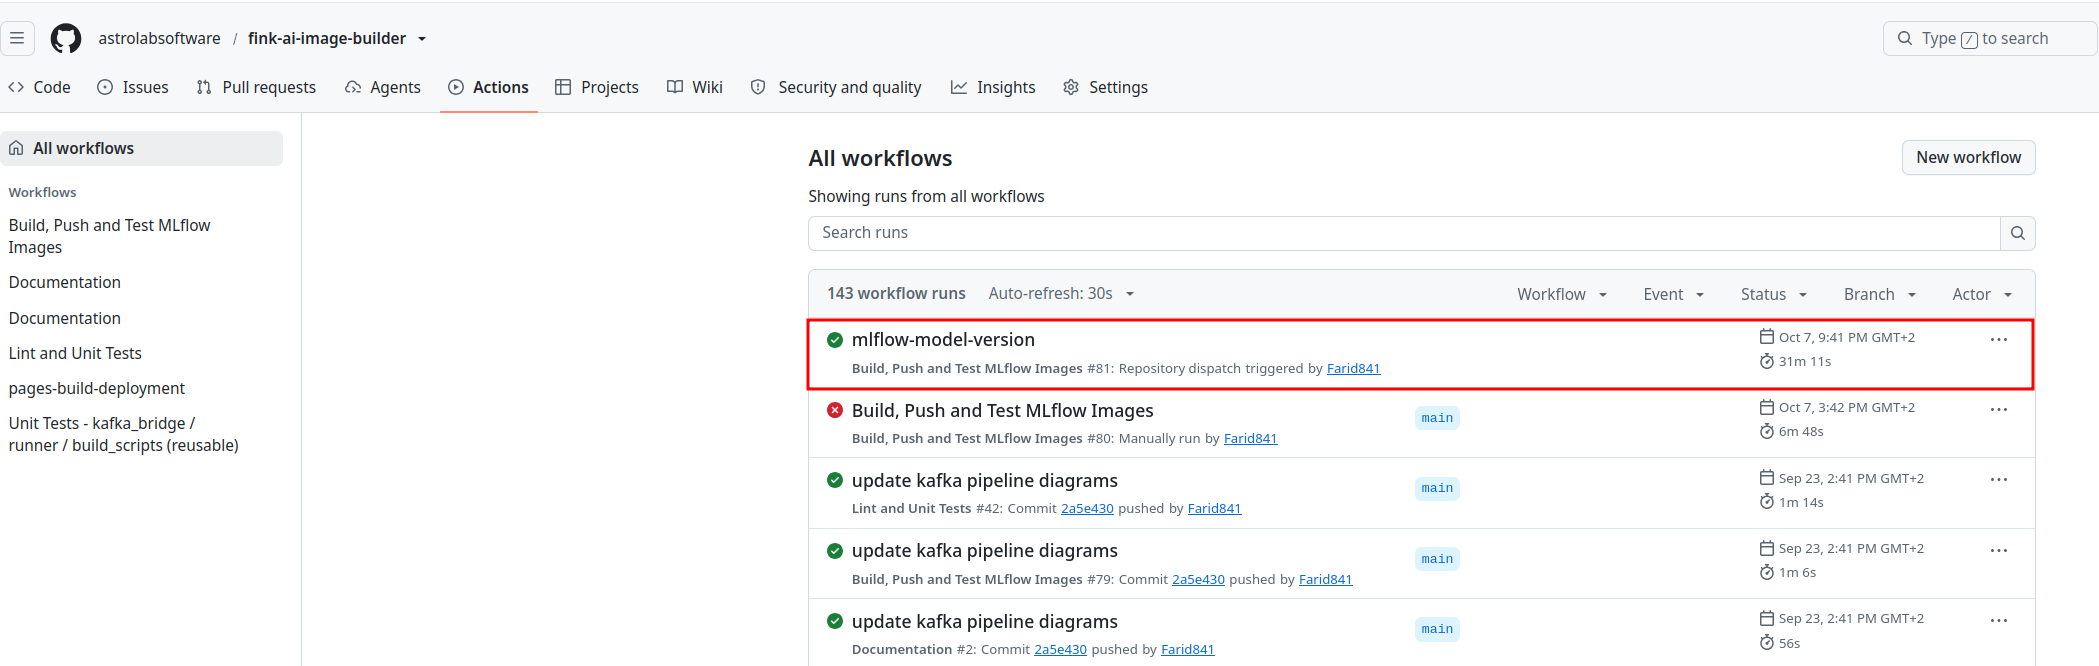
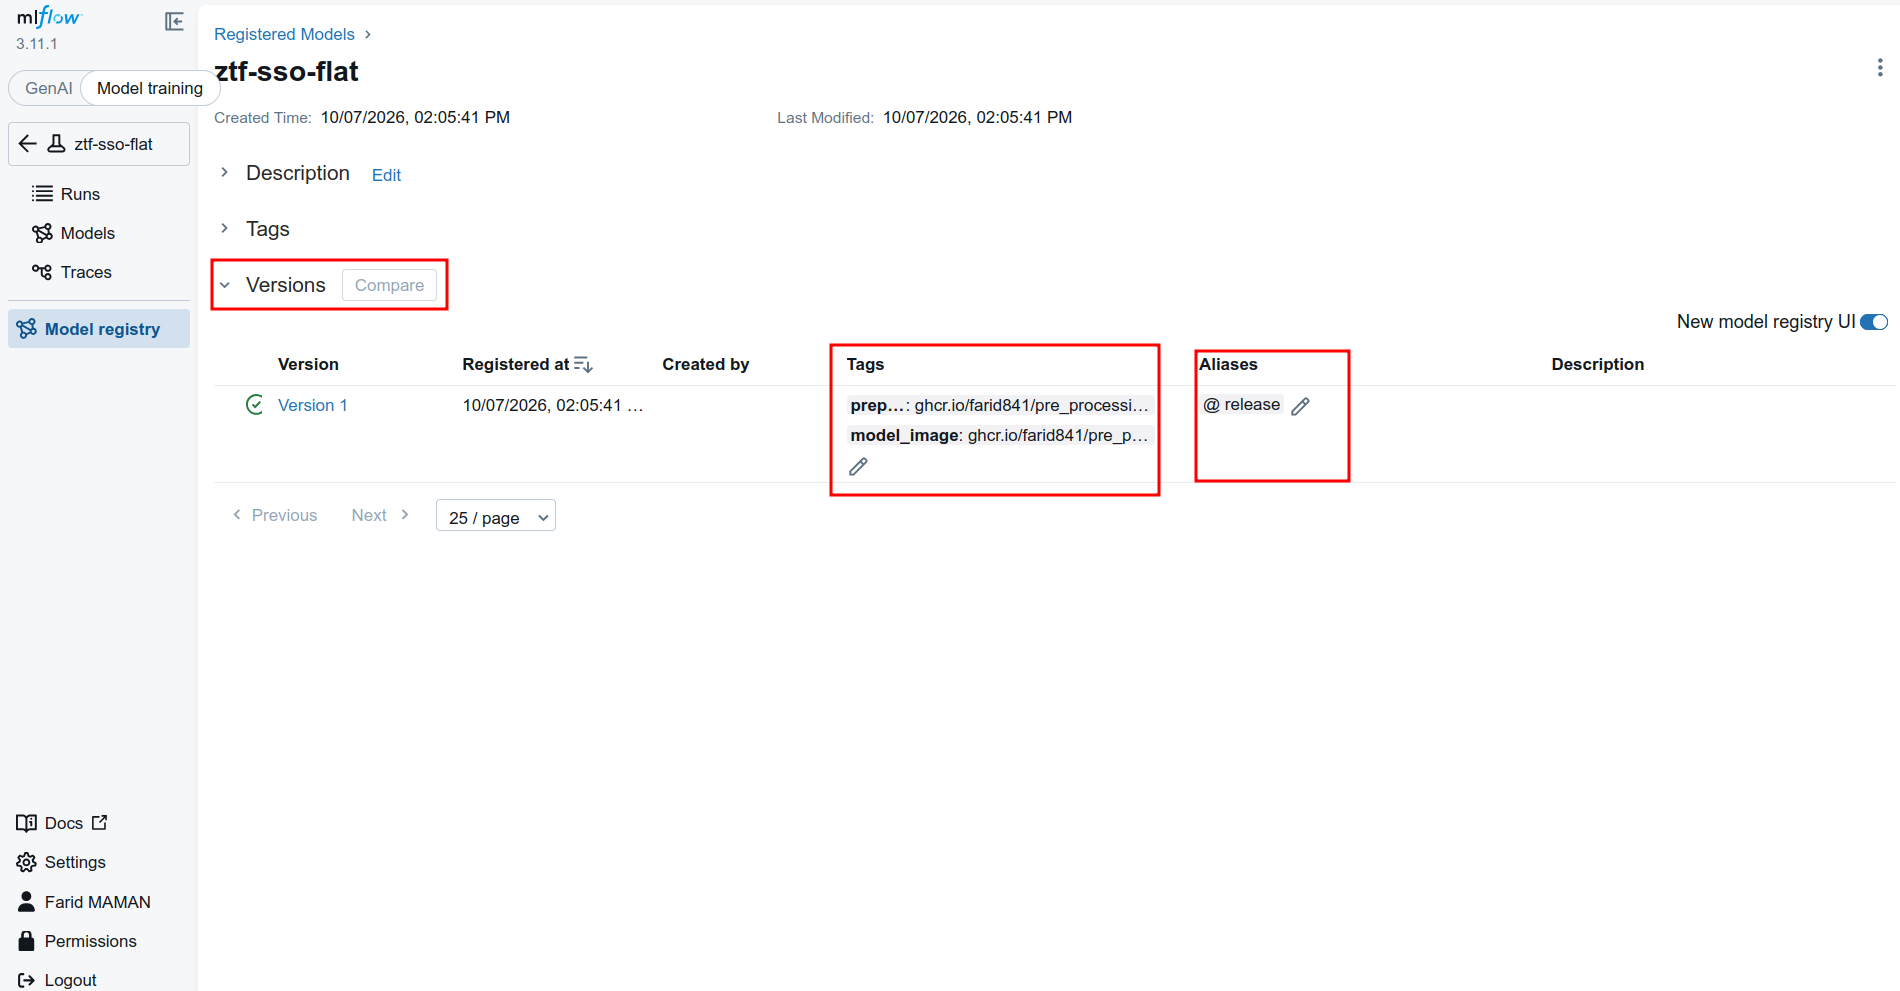
Step 7 Check the tags. When the build succeeds, CI sets two tags on the model version:
| Tag | Value |
|---|---|
preprocessing_image |
ghcr.io/your-org/preprocessing:sha-abc123 |
model_image |
ghcr.io/your-org/model-my-ztf-classifier:sha-abc123 |
They are attached to the version you just published, and visible in the Fink MLflow UI, under Model registry → your model → Versions:
Do not delete anything here
MLflow is the source of truth: the service reads the tags and the alias of the version to find your model. If you delete one of them, the model disappears from the selector.
Step 8 Use your model. Once the tags are set, it appears in the list of AI models of the Fink Science Portal: see Step 4 of Using the service.
Troubleshooting
MLflow says I am not allowed to login
Your account has not been granted access yet: this is expected the first time (see MLflow account creation). You should be given access rapidly, but if that's not the case, reach us on Slack or via email. Once access is granted, sign in again.
Logging to MLflow fails with an authentication error
Check the three variables of MLflow authentication, in the terminal that started Jupyter:
MLFLOW_TRACKING_URIishttps://mlflow.fink-broker.org.MLFLOW_TRACKING_USERNAMEis the username shown on your User Page.MLFLOW_TRACKING_PASSWORDis an access token, not the password of your ORCID or eduGAIN account. If in doubt, create a new token.
fink-model check fails
The command prints the reason:
| Message | What to do |
|---|---|
| An alert raises, or returns a wrong number of values, a NaN, a string... | Handle missing and None fields in pre_processing(), and return one finite float per name in FEATURE_NAMES. |
| More than 5 ms per alert on average | Remove what is slow: Pandas DataFrame, file access, network call. |
| Every feature is constant across all alerts | The preprocessing does not match the alerts: compare your field names with the available columns listed by the command. |
| One feature is constant across all alerts (warning) | Usually a wrong field name. |
log_model() rejects my model
Either the model does not accept the features returned by pre_processing(), or the preprocessing/ folder changed since load_features(). In the second case, run the notebook again from the beginning, so that the model is trained on the current preprocessing.
My model does not appear in the selector
The preprocessing_image or model_image tag is missing on the model version. Check, in this order:
- The version has one of the aliases
release,challengerorchampion. Without it, no build starts. - The build is finished: it takes about 30 minutes.
- The build did not fail (see below).
The build of my model or preprocessing fails
Open the GitHub Actions runs and look at the logs of your run. To start a new build after a fix, log a new version and add the alias again.
The output topic is empty after 10 minutes
Check that there is data for the requested dates and alert classes on the statistics page of the portal.
If there is data, the service may be down for maintenance: try again later.
UNKNOWN_TOPIC_OR_PARTITION error when consuming
The jobs are still starting. Wait 2–3 minutes and retry.
If the topic is more than 7 days old, the data is no longer retained: launch the job again.
The predictions look wrong
Check that the content selected at step 3 is the same as the one used to train the model. pre_processing() receives exactly what you selected: with a different selection, the fields it expects are missing and replaced by default values.